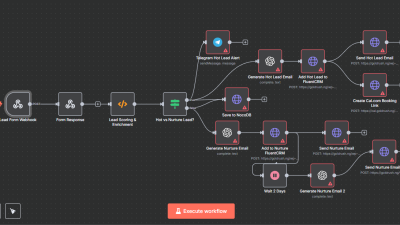
For businesses and individuals seeking to harness the full potential of workflow automation without compromising on data privacy or scalability, self-hosting n8n is the definitive solution. This article provides a detailed procedure for efficiently deploying, managing, and maintaining an n8n instance using Coolify, the open-source, self-hostable PaaS. By following this guide, you will establish a robust and production-ready n8n environment optimized for performance and ease of maintenance.
1. Prerequisites: Setting the Stage
Before diving into the deployment, ensure the following prerequisites are met:
- A Virtual Private Server (VPS): A fresh server instance running a modern Linux distribution (Ubuntu 22.04 LTS is recommended). For optimal performance, a server with at least 2 vCPUs, 4GB of RAM, and 40GB of NVMe storage is advised.
- A Domain or Subdomain: This will be used to access your n8n instance and should be pointed to your server's IP address via an A record in your DNS provider's settings.
- Coolify Installed: A running instance of Coolify on your server. The official Coolify documentation provides a straightforward installation script.
- S3-Compatible Object Storage: For reliable backups, have an S3-compatible object storage bucket ready. This can be from AWS S3, Backblaze B2, MinIO, or any other compatible provider.
2. Initial Deployment: n8n with PostgreSQL on Coolify
For a production environment, it is highly recommended to use PostgreSQL as the database for n8n instead of the default SQLite. This enhances scalability and data management.
Step 2.1: Create a New Project in Coolify
- Navigate to your Coolify dashboard.
- Click on “Projects” in the left-hand menu and then “Create a new Project”.
- Give your project a descriptive name (e.g., “Workflow-Automation”) and click “Create”.
Step 2.2: Deploy the n8n with PostgreSQL Service
- Within your newly created project, click on “Services” in the top navigation.
- Click the “+ Add” button and select “Service”.
- In the “From our list of services” section, use the search bar to find and select “n8n (with PostgreSQL)”.
- Coolify will automatically provision both an n8n application container and a PostgreSQL database container, pre-configured to work together.
Step 2.3: Configure Your Domain and SSL
- Once the deployment is initiated, navigate to the “Configuration” tab of your new n8n service in Coolify.
- Under the “General” section, locate the “FQDN (Fully Qualified Domain Name)” field.
- Enter the domain or subdomain you have pointed to your server (e.g., n8n.yourdomain.com).
- Coolify will automatically provision and renew an SSL certificate for your domain.
3. Performance Optimization: Tuning n8n with Environment Variables
To ensure your n8n instance runs efficiently, especially under heavy load, it is crucial to configure its environment variables.
Step 3.1: Accessing Environment Variables in Coolify
- From your n8n service dashboard in Coolify, go to the “Environment Variables” tab.
- Here, you can add, edit, and delete the environment variables that control n8n's behavior.
Step 3.2: Recommended Environment Variables for Efficiency
Add the following environment variables to optimize your n8n instance:
- EXECUTIONS_MODE=queue: This is one of the most critical settings for performance. It processes workflows in a queue, preventing the main thread from being blocked by long-running executions.
- EXECUTIONS_DATA_PRUNE=true: Enables automatic pruning of old execution data, keeping your database lean and performant.
- EXECUTIONS_DATA_MAX_AGE=168: Sets the maximum age (in hours) of execution data to keep. 168 hours (7 days) is a good starting point for most use cases. Adjust based on your data retention needs.
- DB_POSTGRESDB_SSL_REJECT_UNAUTHORIZED=false: Often necessary when connecting to the Coolify-managed PostgreSQL database within the same Docker network.
- GENERIC_TIMEZONE: Set this to your local timezone to ensure correct scheduling of workflows (e.g., Europe/London). A full list of timezones can be found online.
- N8N_EMAIL_MODE=smtp: If you wish to send emails from n8n (e.g., for user invites or password resets), configure your SMTP provider's details through the corresponding N8N_SMTP_* environment variables.
After adding or modifying these variables, click the “Deploy” button on your n8n service page in Coolify to apply the changes.
4. Backup and Restore: A Safety Net for Your Automations
Coolify's built-in backup capabilities make it simple to safeguard your n8n instance, including your workflows, credentials, and execution history.
Step 4.1: Configure S3 Backups in Coolify
- In your Coolify dashboard, navigate to “Server” and select your server.
- Go to the “Destinations” tab and click “Add a new Destination”. Select “S3”.
- Enter your S3 bucket details (name, region, access key, and secret key).
- Once the destination is configured, navigate to the PostgreSQL service within your n8n project.
- Go to the “Backups” tab.
- Enable backups and select your configured S3 destination.
- Set a schedule for your backups (e.g., daily).
Step 4.2: Backing Up n8n's Persistent Volume
n8n stores credential files and other important data in a persistent Docker volume.
- In your n8n service dashboard in Coolify, go to the “Storages” tab.
- Identify the persistent volume for your n8n data (usually named something like n8n_data).
- While Coolify's database backup is automated, volume backups are a manual process. For a robust strategy, you can set up a cron job on the host server to periodically back up this volume to your S3 bucket using a tool like rclone.
Step 4.3: Restoring a Backup
- To restore the PostgreSQL database, navigate to the backups tab of the database service in Coolify and select the backup you wish to restore.
- To restore the n8n volume, you would manually retrieve the backup from your S3 storage and replace the contents of the persistent volume on the server.
5. Maintenance and Updates: Keeping Your Instance Healthy
Regular maintenance and updates are crucial for security and access to new features.
Step 5.1: Updating n8n
- Before updating, it's a good practice to check the n8n release notes for any breaking changes.
- Best Practice: Create a backup of your n8n instance before initiating an update.
- In your n8n service dashboard in Coolify, you will be notified when a new version of the n8n Docker image is available.
- Simply click the “Deploy” button to pull the latest image and restart the service. Coolify will handle the process of stopping the old container and starting the new one.
Step 5.2: Updating Coolify
- Coolify can be configured to update itself automatically. Navigate to “Settings” > “Coolify” to manage auto-update settings.
- For production environments, it's recommended to disable automatic updates and perform them manually during a maintenance window.
- When a new version of Coolify is available, a notification will appear in the dashboard. Click the update button to initiate the process.
Step 5.3: Monitoring
- Regularly check the “Resource Usage” tab for your n8n service and PostgreSQL database in Coolify to monitor CPU, memory, and storage consumption.
- Review the “Logs” for your n8n service to identify any errors or warnings in your workflows.
- For more in-depth monitoring, consider deploying a monitoring stack like Prometheus and Grafana, which can also be deployed as services within Coolify.
By adhering to this Standard Operating Procedure, you can confidently and efficiently self-host a production-ready n8n instance with Coolify, empowering you to automate at scale while maintaining full control over your data and infrastructure.